 Complete Elite
Refer to Automated Event-Based Communication (AutoSend): Overview for general information.
Step One: ensure you have message templates available so you are able to select them when creating your AutoSend Communications. You can utilise existing Message Templates (e.g. a "Welcome new families" message) or create new templates. To view, edit or create message templates, go to Administration -> Edit Message Templates.
Common merge fields used in messages to populate family and student information are:
%%StudentFirstName%%
%%FAMILYNAME%%
%%CURRENTENROLMENTS%%
%%CURRENTENROLMENTSWITHAREA%%
Step Two: set up your AutoSend Communications - see below.
AutoSend Communications Setup
1. From Configuration, click on Automatic Communication Events under the 'Communications Preferences' heading.
2. Click on Add Event.
3. Select your 'Event Type' from the dropdown. The Event is what triggers the communication. Select from:
- New Family - a brand new family
- New Student - a new student on a family
- New Enrolment - a new enrolment on a student - this could be a change of enrolment or an additional enrolment
- First Enrolment - a student's very first enrolment
- First Attendance - a student's very first attendance
- New Family Pass Issued - a new pass
4. Select your 'Event Source' from:
- Anywhere (generated by a User and / or from the Family Portal)
- SimplySwim Staff / User (only those events added by a User / staff in SimplySwim)
- Family Portal (only those events added from the Family Portal).
This allows you to have different messaging if required from the different origin point.
5. Select your 'Send After Event Time' from the dropdown. This is how long after the event happens the communication will be sent (e.g. after 1 hour, 48 hours etc).
6. Select your Communication / Message Template from the dropdown. These are listed by message type in the order of Email, Push Notification then SMS, and then in alphabetical order by template name.
7. Select your 'Send to Contact Type' recipient. The default is 'Both (Attendance & Billing)'.
NOTE: The 'Sending Enabled' box at the top must be ticked for this AutoSend Communication to become active. If it is not ticked, that Auto Communication will not send.
Repeat the process to Create as many Automatic Communications as needed.
Examples of types of AutoSend Communications
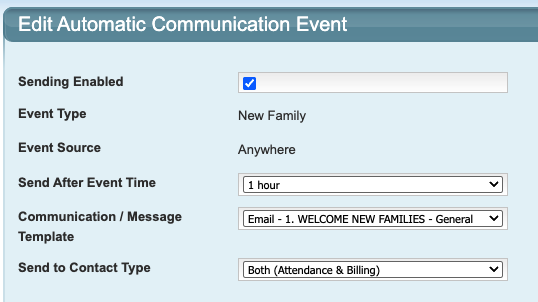
Event Type: New Family
Event Source (origin): Anywhere (Family Portal or entered by staff)
In this example configuration, the "Welcome New Families" message template will be emailed to a New Family one hour after they have been entered into the system from either a User / staff member or from the Family Portal.
Welcome emails typically contain enrolment information, details on downloading and registering for the SimplyPortal App and setting up their payment details as well as any other pertinent information.
Event Type: New Family
Event Source (origin): Anywhere
In this example configuration, the "SimplyPortal App Reminder" message template will be emailed to a New Family two days after they have been entered into your system.

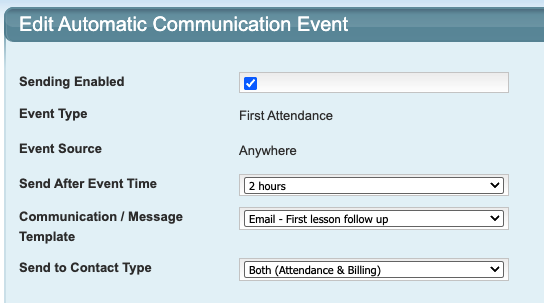
Event Type: First Attendance
Event Source (origin): Anywhere
In this example configuration, the "First lesson follow up" message template will be emailed to the family two hours following the student's attendance in their first actual class.
Last updated: 11th February 2026
Was this article helpful?
That’s Great!
Thank you for your feedback
Sorry! We couldn't be helpful
Thank you for your feedback
Feedback sent
We appreciate your effort and will try to fix the article