Overview
This article provides instruction on creating a Communication Campaign for bulk communications.
Bulk communications can be targeted to specific groups depending on the campaign conditions.
To send an individual communication, refer to: How To: Communicate with an Individual FamilyHow-To Video
Setup Guide
TABLE OF CONTENTS
Before You Start
A message template needs to be created first to use in the Communication Campaign.
Refer to: How To: Create or Edit a Message TemplateHow to CREATE a Communication Campaign
1. Go to Administration → Communication Campaigns and click "Create Campaign".
2. Fill in the fields and click "Save new campaign".
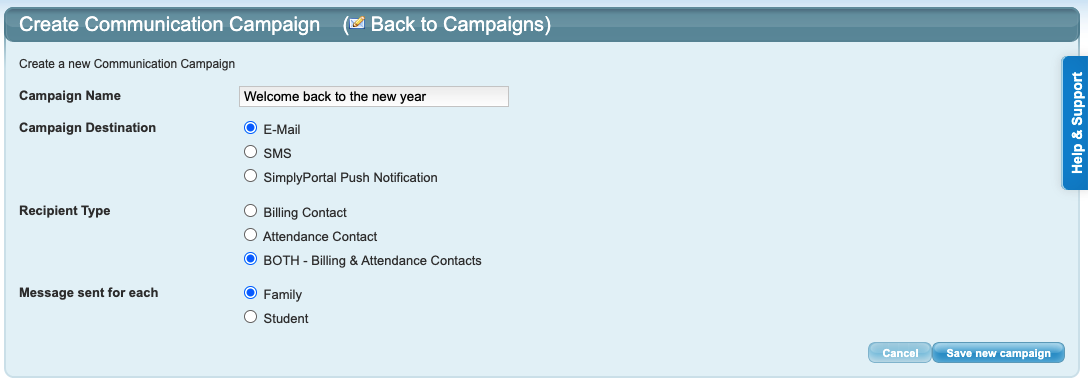
Field | Response |
Campaign Name | Name your campaign. This is for your reference (not visible to families). |
Campaign Destination | Select the campaign type. If you want to send the same campaign via different methods, a separate campaign will need to be sent for each type. |
| Recipient Type | This depends on the message being sent. Recommended selection: "BOTH - Billing & Attendance Contacts" in case the family contact is different. |
| Message sent for each | Recommended selection: Family. Family = 1 message regardless of number of students Student = 1 message per student (3 students = 3 messages for the family) |
3. Select the message template from the dropdown and click "Save Campaign Content".
4. Select the Campaign Conditions. The standard conditions can be kept, changed or removed. Additional conditions can be added from the dropdown. Click "Save Campaign Conditions".
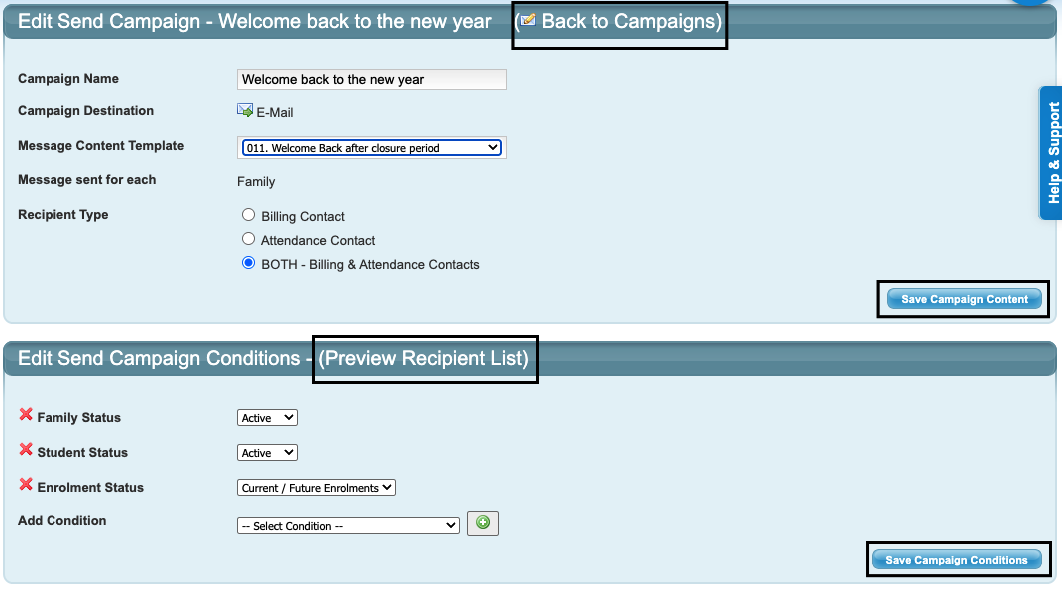
TIP: Families need to meet every single condition to be included in the campaign.
When multiple options need to be included (e.g. multiple teachers), select them in the same field, do not add multiple of the same condition.
Both the Campaign Content (top section) and Campaign Conditions (bottom section) must be saved to create the campaign.

TIP: Click on "Preview Recipient List" to check who will receive the communication.
5. Click "Back to Campaigns". The Campaign is now ready to be sent or scheduled.
How to EDIT a Communication Campaign
1. Go to Administration → Communication Campaigns.
2. Click on the yellow edit folder in the Actions column for the campaign. Repeat the above steps in the Create Campaign section to edit.

How to SEND a Communication Campaign
1. Go to Administration → Communication Campaigns.
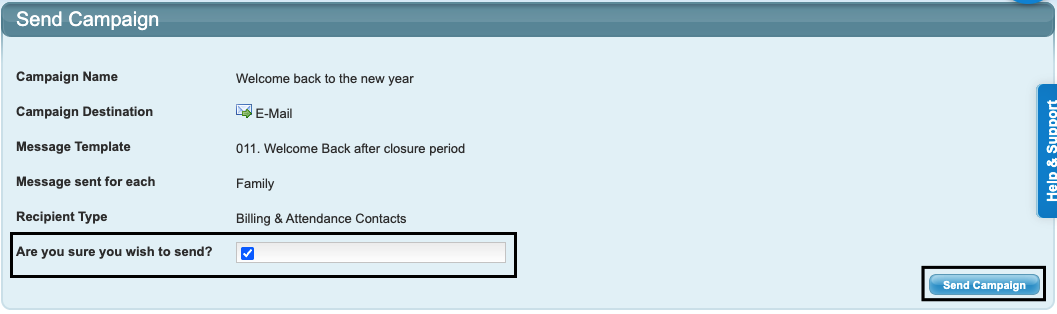
2. Click the white scroll with the green arrow (second action) next to the campaign to be sent.

3. Tick the box "Are you sure you wish to send?" and click "Send Campaign".
Further Information
To Schedule a Campaign to be sent at a later date / time, refer to: Scheduled Communication Campaigns
To troubleshoot campaigns, refer to: Troubleshooting: Communication Campaigns
Last updated 23 June 2026
Was this article helpful?
That’s Great!
Thank you for your feedback
Sorry! We couldn't be helpful
Thank you for your feedback
Feedback sent
We appreciate your effort and will try to fix the article