SimplySwim allows you to keep track of inventory items and supplier invoices.
This article will guide you through the initial Inventory setup for your system. You need to:
- Step 1: Set up your suppliers
- Step 2: Set up your stock categories
- Step 3: Add your inventory items
- Step 4: Link these inventory items to your POS items.
- Step 5: Process Supplier Invoice. Once that is all set up, you then need to process a supplier invoice (from your Administration tab) to get your initial load (quantity and cost price). Refer to Process Supplier Invoice.
STEP ONE
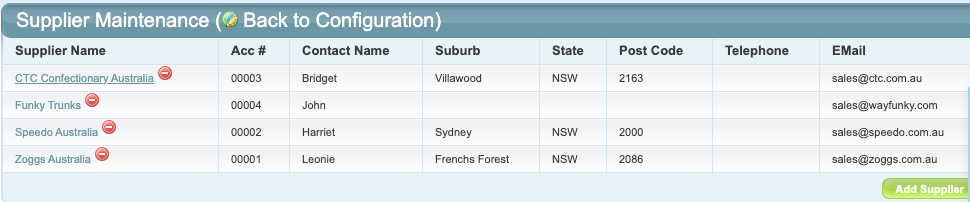
1.1. Set up your Suppliers. Go to your Configuration tab and select "Suppliers" from the Point of Sale / Inventory category on the top right-hand side.

1.2. Click on "Add Supplier".

1.3. Enter your supplier's details and click "Save".

Note: You can go back and edit your Suppliers at any time from your Suppliers list by clicking on the supplier name (a) and then "Edit Supplier" on the next window (b).
(a)
(b)

STEP TWO
2.1. Once you have finished adding in your suppliers, you need to set up your stock categories. Go back to Configuration" and select "Stock Categories".

2.2. This screen will display all your stock categories. To add a new category, click on "Add Stock Category".

2.3. Add a name for your category. You don't need to add anything in the GL / Accounting Code, but it is recommended for reporting to add this in asap. Make sure you select GST or GST Free. Click "Save Stock Category". You can go back and edit these by clicking on the Stock Category Name in the previous screen.

STEP THREE
3.1. Next you need to set up your Inventory Items. Go back to Configuration and select "Inventory Items", then click "Add Inventory Item".

3.2. Enter the details of the inventory item:
- Insert the Item Name.
- You can either leave the Item Description blank, or copy the Item Name in there.
- Select your Supplier from the drop-down menu.
- Enter your Supplier Reference number.
- Select your Item Category from the drop-down menu.
- Select GST or GST Free from the drop-down menu.
- Insert the Unit of Measure (eg. "each" or "bag" or "can" or "bottle" depending on the item).
- Stock location (eg. kiosk, store room, reception, etc).
- Enter your minimum and maximum supply levels (eg. if you want to be alerted when you only have 3 of an item remaining and you want no more than 15 in stock, you would enter 3.000 / 15.000)
- Click "Save".

An example of a completed Inventory Item would look like this:

STEP FOUR
4.1. Link your Inventory items to your POS Items. Go back to your Configuration tab and click on "POS Items".

4.2. You need to click on an existing item in the list of POS Items to open the "Edit POS Item" screen.
If your item is not in the list, click "Add Item" and enter the details, then click "Save" - if you need more information on this, see this article for more information: Setting Up Point of Sale (POS).
4.3. Underneath the POS Item information, you will see a "Linked Inventory Items" section.
In the white "Item" box, start typing in the inventory name from your list of inventory items created in the previous steps (eg. Merchandise, Hot Food, Lollies, Drinks, Swim Cap Yellow, etc) and the Inventory Item should appear underneath. Hover over the name until it goes white and click on it (note: if it stays blue rather than white, it will not add the link).
The Quantity (Qty) here is the number you want to sell of that item each time (not the quantity you have on hand). Generally you will want this to be 1 but the option is there to change this if a sale is always for more than one of the item at a time.
Then click "Add Link".

It will then appear in the linked section. Click "Save" in the blue section.

PART TWO
As part of your initial Inventory set up, to get your baseline stock count and load, once you have completed the above steps you need to issue and post a supplier invoice.
Go to your Administration tab and click on "Process Supplier Invoice".

See this article for steps on how to process a Supplier Invoice: Process Supplier Invoice
Was this article helpful?
That’s Great!
Thank you for your feedback
Sorry! We couldn't be helpful
Thank you for your feedback
Feedback sent
We appreciate your effort and will try to fix the article