Overview
Receipt Messages can be used to add messages to all statements and POS receipts. Multiple messages can be included.
Setup Guide
TABLE OF CONTENTS
Before You Start
A User wth access to Configuration needs to complete the below steps.
How to Add a Receipt Message
1. Go to Configuration → Receipt Messages and click on "Add Receipt Message".
2. Add in a Name / Description. This is not displayed externally.
3. Enter a date range for the display of the message.
Tips on dates:
- to display the message immediately, enter yesterday's date as the Start Date.
- leave the End Date to the default, especially for generic / regular / ongoing messages.
- you can leave the dates as the default and make the message inactive when you don't want it to display (e.g. different messages for different terms, holiday programs etc).
4. Enter the message in the field and click "Save".
Example:
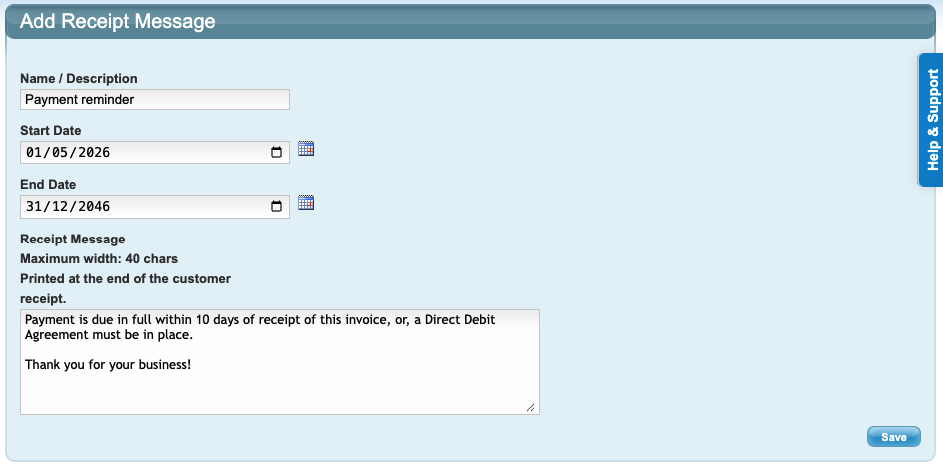
Note: If you use a Receipt Printer, any receipt messages will appear on these as well. Use a maximum message width of 40 characters.
If you are not using a Receipt Printer, the message width does not apply.
How to Edit a Receipt Message
1. Go to Configuration → Receipt Messages and click on the Description name of the message.

2. Make changes and click "Save".
How to Delete a Receipt Message
1. Go to Configuration → Receipt Messages and click on the red circle next to the message.
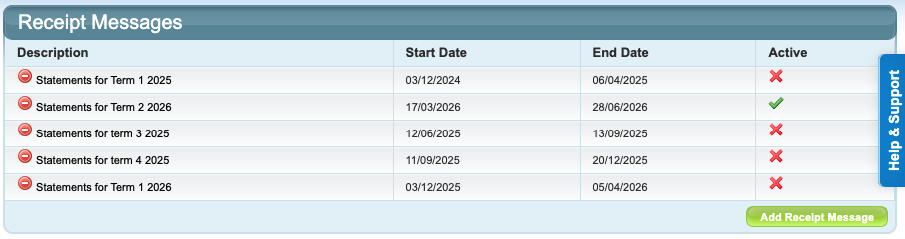
How to Make a Receipt Message Active / Inactive
1. Go to Configuration → Receipt Messages.
✔️ = Active (message will display within the configured dates)
❌ = Inactive message (message will not display)
2. Click on the ❌ to make an inactive message Active.
OR
Click on the green ✔️ to make an Active message Inactive.
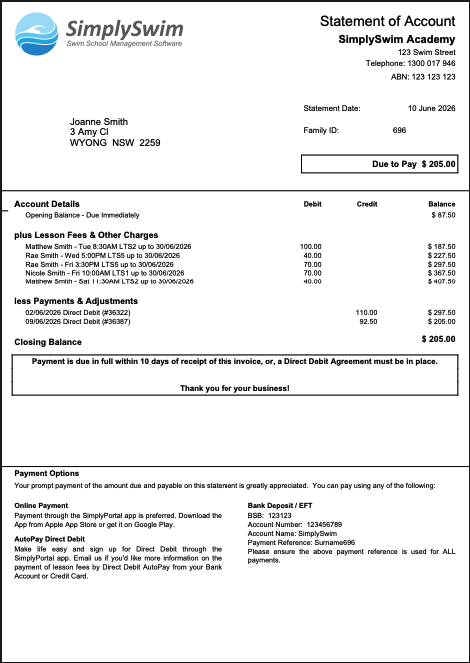
How do Receipt Messages Display?
Active Receipt Messages display in a box at the bottom of a Statement. Multiple Receipt Messages will display in separate boxes.
Example:
Last updated 10 June 2026
Was this article helpful?
That’s Great!
Thank you for your feedback
Sorry! We couldn't be helpful
Thank you for your feedback
Feedback sent
We appreciate your effort and will try to fix the article